Have you ever wondered why mini cupcakes seem to disappear faster than their full-sized counterparts at parties and gatherings? Is it their adorable size, the endless flavor possibilities, or the fact that they’re just so darn cute? Whatever the reason, mini cupcakes have captured the hearts (and taste buds) of dessert lovers everywhere. In this blog post, we’ll dive into some of the most popular flavors of mini cupcakes, how to make them, and why they’re such a crowd-pleaser. By the end, you’ll be ready to whip up your own batch and impress everyone with your baking skills 1.
But here’s the thing—mini cupcakes aren’t just about being smaller versions of regular cupcakes. They offer a unique opportunity to experiment with flavors, textures, and presentations without overwhelming your guests. Whether you’re hosting a birthday party, a holiday celebration, or simply craving something sweet, mini cupcakes are the perfect solution. Their bite-sized nature makes them ideal for sampling multiple flavors, which is especially appealing when you’re catering to diverse tastes. Plus, who can resist the charm of a tiny treat that fits perfectly in your hand?
Overview: Why Mini Cupcakes Are Special
Mini cupcakes are like the little black dress of desserts—versatile, timeless, and always in style. They’re perfect for any occasion, from birthday parties to holiday celebrations, and even casual get-togethers. The best part? They’re quick to make and easy to customize. Whether you’re a beginner baker or a seasoned pro, you can master these delightful treats in no time.
Time Requirement:
- Prep Time: 20 minutes
- Bake Time: 12–15 minutes
- Total Time: ~45 minutes
Difficulty Level: Beginner-friendly
With just a few simple ingredients and some creativity, you can create a variety of flavors that will leave everyone craving more 4. But what sets mini cupcakes apart from their larger counterparts is their ability to cater to individual preferences. For example, if you’re serving a group with varying dietary needs, you can easily bake gluten-free, vegan, or low-sugar options without compromising on taste or presentation. This flexibility makes them an excellent choice for bakers of all skill levels.
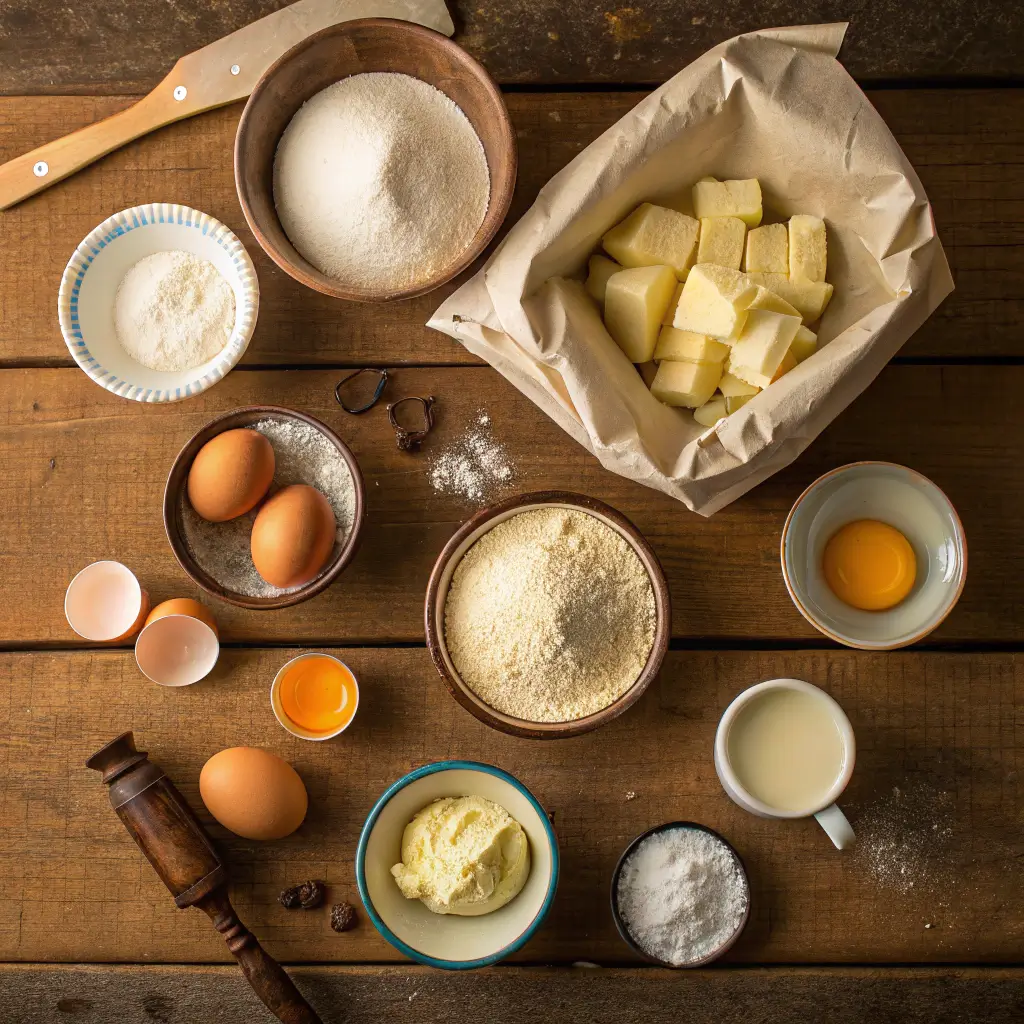
Essential Ingredients: The Building Blocks of Flavor
To make delicious mini cupcakes, you’ll need a handful of key ingredients. These components not only form the base of your cupcakes but also allow you to experiment with different flavors. Here’s what you’ll need:
- All-Purpose Flour : Provides structure and texture. For gluten-free options, try almond or oat flour.
- Why it matters: Flour acts as the backbone of your cupcakes, giving them shape and stability. If you’re looking to make healthier alternatives, consider using whole wheat flour or coconut flour, though keep in mind that these may alter the texture slightly.
- Sugar : Adds sweetness and helps create a light, fluffy texture. You can use granulated sugar, brown sugar, or even coconut sugar for a healthier twist.
- Pro Tip: Brown sugar adds moisture and a subtle caramel flavor, making it a great choice for richer cupcake varieties like chocolate or spice.
- Eggs : Bind the ingredients together and add moisture. Vegan bakers can substitute flax eggs or applesauce.
- Substitution Idea: One tablespoon of ground flaxseed mixed with three tablespoons of water equals one egg. This works beautifully in most cupcake recipes.
- Butter or Oil : Adds richness and keeps the cupcakes moist. Butter gives a classic flavor, while oil makes them extra tender.
- Expert Insight: Melted butter provides a rich, indulgent taste, whereas neutral oils like vegetable or canola oil yield a softer crumb.
- Milk : Enhances the batter’s consistency. Use whole milk, almond milk, or coconut milk depending on dietary preferences.
- Fun Fact: Coconut milk adds a tropical twist to vanilla or fruit-based cupcakes, while almond milk pairs wonderfully with nutty flavors.
- Baking Powder/Soda : Helps the cupcakes rise and become airy.
- Important Note: Always check the expiration date of your leavening agents. Old baking powder can result in flat, dense cupcakes.
- Vanilla Extract : A must-have for enhancing flavor. Feel free to experiment with almond or lemon extract for unique twists.
- Creative Suggestion: Lemon extract brightens citrus-flavored cupcakes, while almond extract complements cherry or amaretto-inspired creations.
For flavor variations, consider adding mix-ins like cocoa powder, fruit purees, or crushed cookies. The possibilities are endless 5. For instance, folding in chopped strawberries or blueberries not only enhances the flavor but also adds a pop of color that makes your cupcakes stand out visually.
Looking for a quick and delightful dessert? Our 3-Ingredient No-Bake Cheesecake offers simplicity and taste in every bite.
Step-by-Step Instructions: Baking Made Simple
Now that you know the essentials, let’s get baking! Follow these steps to create a batch of mouthwatering mini cupcakes:
- Preheat Your Oven : Set your oven to 350°F (175°C). Line a mini cupcake tin with paper liners for easy cleanup.
- Why It Matters: Preheating ensures even baking, preventing undercooked centers or burnt edges.
- Mix Dry Ingredients : In a bowl, whisk together flour, sugar, baking powder, and a pinch of salt. This ensures even distribution of leavening agents.
- Pro Tip: Sifting the dry ingredients removes lumps and aerates the mixture, resulting in lighter cupcakes.
- Combine Wet Ingredients : In another bowl, beat eggs, melted butter (or oil), milk, and vanilla extract until smooth.
- Expert Advice: Room-temperature ingredients blend more easily, creating a smoother batter.
- Blend Together : Gradually add the wet mixture to the dry ingredients, stirring gently until just combined. Overmixing can lead to dense cupcakes.
- Common Mistake: Mixing too vigorously develops gluten, making the cupcakes tough instead of tender.
- Add Flavor Variations : Divide the batter into separate bowls and stir in your chosen flavors—cocoa powder for chocolate, strawberry puree for fruity goodness, or crushed Oreos for a cookies-and-cream twist.
- Creative Idea: Try swirling two batters together for a marbled effect. Simply drop spoonfuls of each flavor alternately into the tin and swirl with a toothpick.
- Fill the Tins : Spoon the batter into the prepared tins, filling each cavity about two-thirds full. This prevents overflow during baking.
- Handy Hack: Use an ice cream scoop for consistent portion sizes and minimal mess.
- Bake to Perfection : Pop the tray into the oven and bake for 12–15 minutes. Insert a toothpick into the center of a cupcake; if it comes out clean, they’re done!
Pro Tip: Rotate the tray halfway through baking for even cooking 4. Additionally, avoid opening the oven door frequently, as sudden temperature changes can cause the cupcakes to sink.
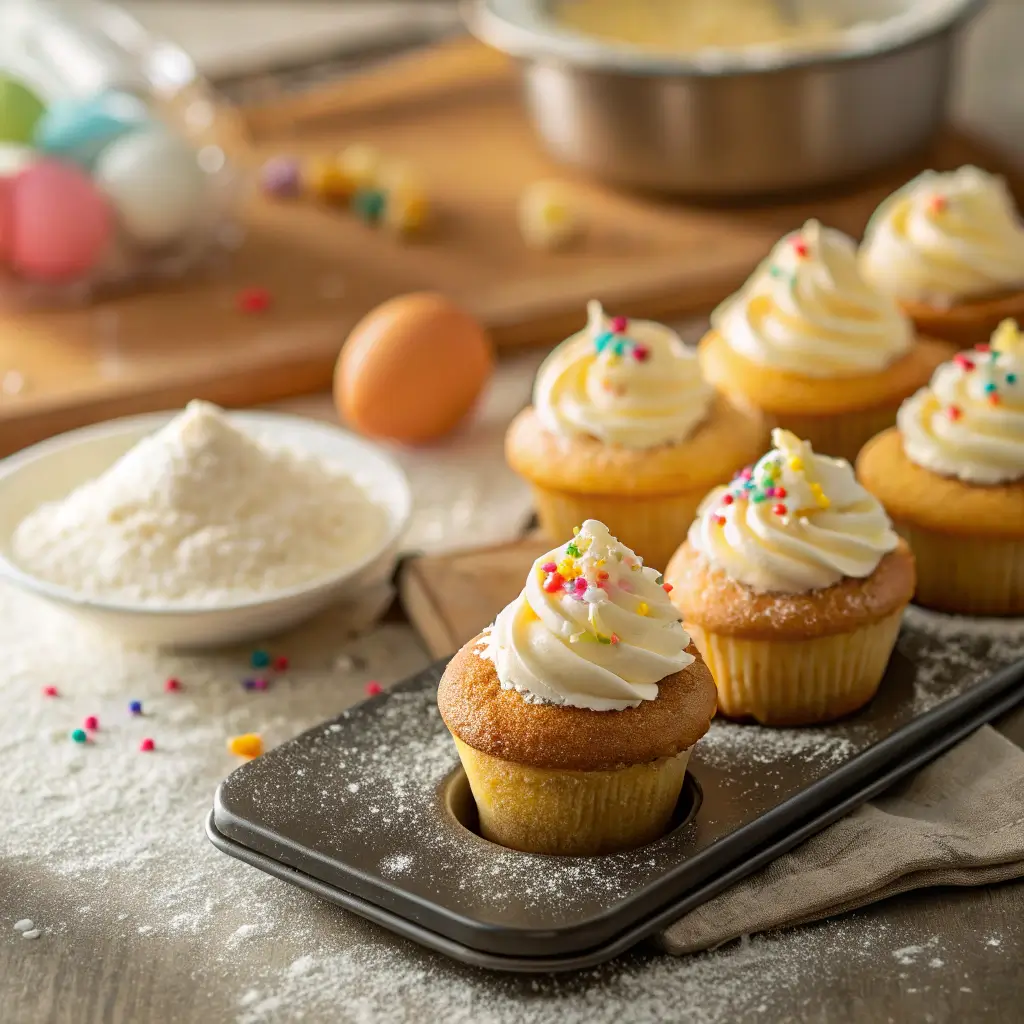
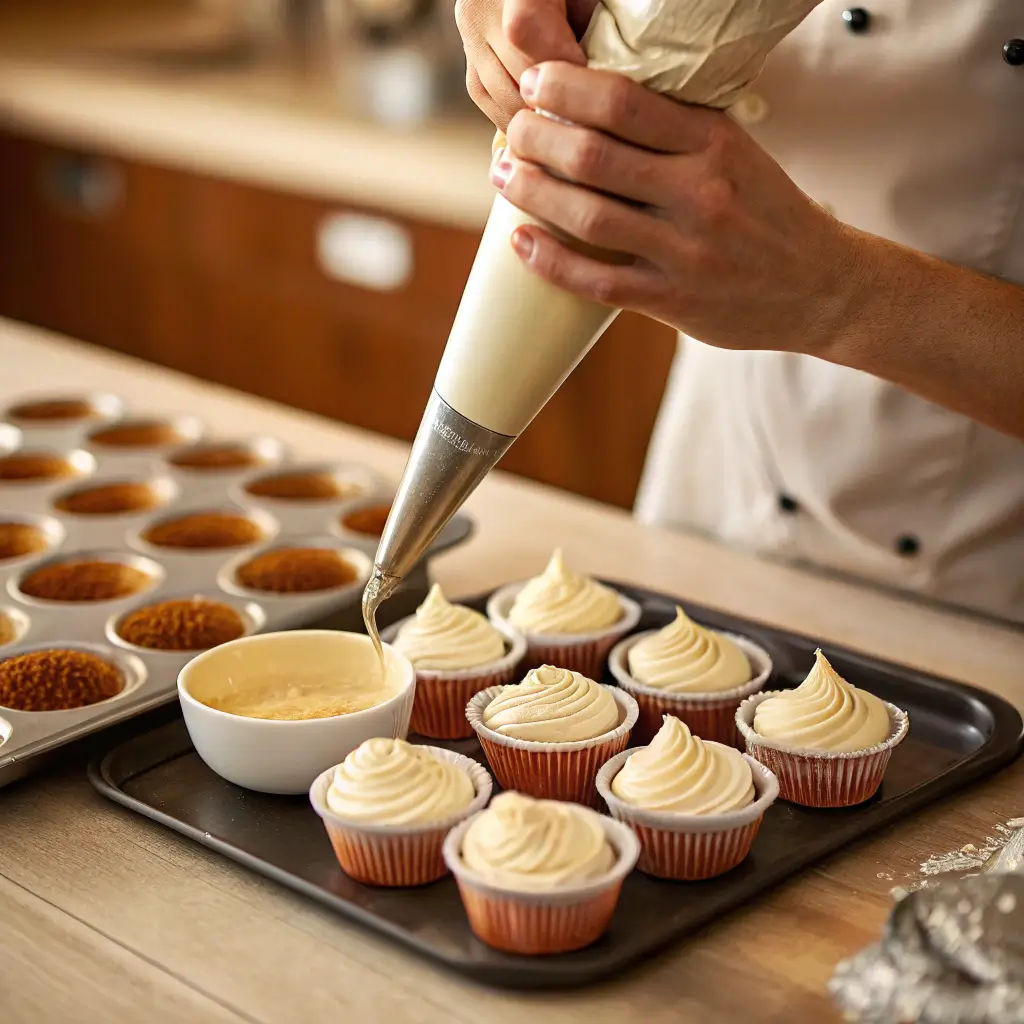
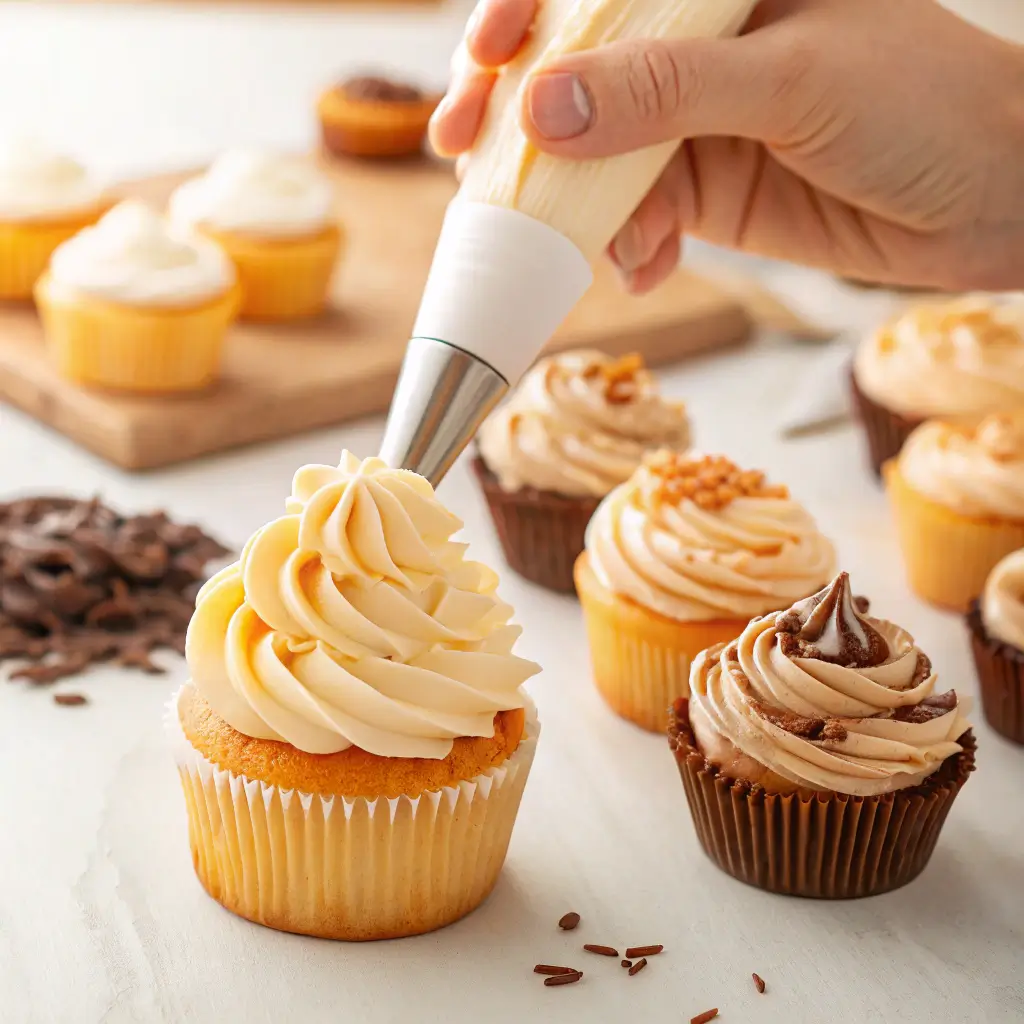
Assembly: Decorating Like a Pro
Once your mini cupcakes are baked and cooled, it’s time to decorate! Frosting is where you can truly let your creativity shine. Here’s how to assemble and present your mini cupcakes:
- Choose Your Frosting : Buttercream is a classic choice, but cream cheese frosting pairs beautifully with red velvet or carrot cake flavors. For something lighter, try whipped cream or ganache.
- Flavor Pairing: Chocolate ganache complements dark chocolate cupcakes, while citrus-infused buttercream enhances lemon or orange varieties.
- Pipe It On : Use a piping bag fitted with a star tip for elegant swirls or simply spread frosting with a knife for a rustic look.
- Beginner’s Guide: If you don’t own a piping bag, snip off the corner of a resealable plastic bag and insert a piping tip for a DIY solution.
- Add Toppings : Sprinkle crushed nuts, sprinkles, or edible glitter for a pop of color. Fresh berries, chocolate shavings, or caramel drizzle can elevate the presentation further.
- Presentation Tip: Arrange your mini cupcakes on a tiered stand for a stunning display at parties 1.
For themed events, consider matching decorations to the occasion. For example, pastel-colored frostings and floral toppings work well for baby showers, while spooky designs like spiderwebs or ghosts are perfect for Halloween.
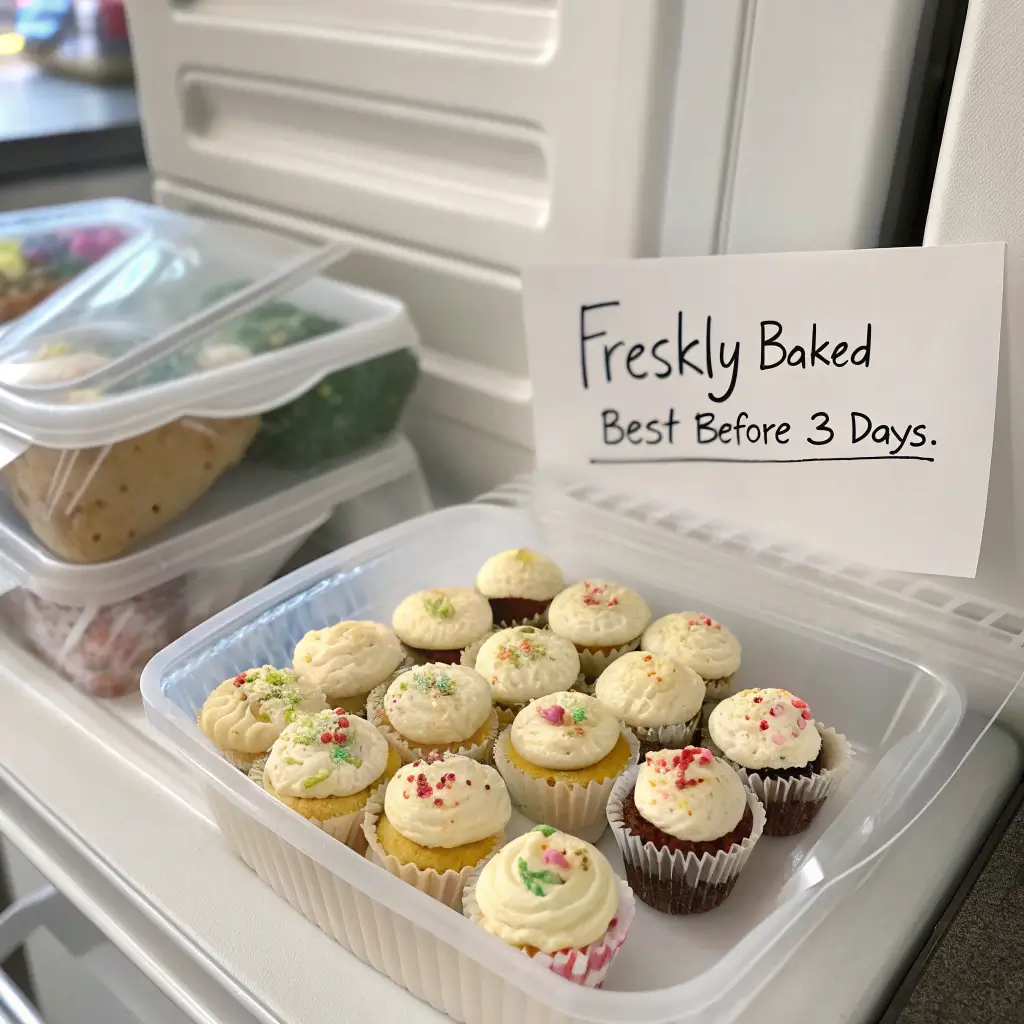
Storage and Make-Ahead Tips: Keep Them Fresh
One of the perks of mini cupcakes is their portability and ease of storage. To keep them fresh:
- Room Temperature : Store in an airtight container for up to 2 days.
- Refrigeration : If frosted with cream cheese or whipped cream, refrigerate and bring to room temperature before serving.
- Freezing : Unfrosted mini cupcakes freeze well for up to 3 months. Wrap individually in plastic wrap and place in a freezer-safe bag. Thaw overnight in the fridge before frosting.
Make-Ahead Tip: Prepare the batter a day in advance and refrigerate. Bring it to room temperature before baking 9. Another clever trick is to bake plain mini cupcakes ahead of time and freeze them unfrosted. When you’re ready to serve, thaw, frost, and decorate for a freshly made appearance.
Recipe Variations: Get Creative!
Why stick to one flavor when you can explore so many? Here are some creative ideas to inspire your next batch:
- Salted Caramel : Top chocolate mini cupcakes with caramel sauce and a sprinkle of sea salt 2.
- Strawberry Cheesecake : Swirl cheesecake filling into vanilla batter and top with fresh strawberries 1.
- Lemon Blueberry : Fold blueberries into lemon-flavored batter for a burst of freshness 3.
- Peanut Butter Drizzle : Fill peanut butter mini cupcakes with a dollop of jelly and drizzle melted peanut butter on top 4.
Feel free to mix and match flavors to suit your mood or occasion!
If you’re a fan of indulgent desserts, you’ll love our Mini Cupcakes. For those who prefer a classic treat, our Baker’s German Chocolate Cake is a must-try
Conclusion: Let Your Creativity Shine
There’s no denying the charm of mini cupcakes. With their bite-sized appeal and endless flavor possibilities, they’re a guaranteed hit at any gathering—or even as a personal treat. So grab your apron, gather your ingredients, and start experimenting with these delightful desserts. Who knows? You might discover a new favorite flavor along the way!
Remember, baking is as much about the process as it is about the final product. Don’t be afraid to try new combinations, adjust recipes to suit your preferences, or involve friends and family in the fun. After all, the joy of baking lies in sharing your creations with others—and enjoying every delicious bite yourself!
FAQs: Your Burning Questions Answered
- How do I prevent my mini cupcakes from sinking?
Ensure your baking powder is fresh and avoid opening the oven door too soon during baking. - Can I make these healthier?
Absolutely! Substitute sugar with honey or maple syrup, use whole wheat flour, and opt for Greek yogurt instead of butter 5. - Are mini cupcakes kid-friendly?
Yes! Kids love helping decorate them, making it a fun family activity. - What’s the best way to transport mini cupcakes?
Use a sturdy container with dividers to prevent squishing. - Do mini cupcakes have fewer calories than regular ones?
While smaller in size, portion control is key. Enjoy guilt-free by using wholesome ingredients 8.
Happy baking, and don’t forget to share your creations with friends and family—they’ll thank you later!